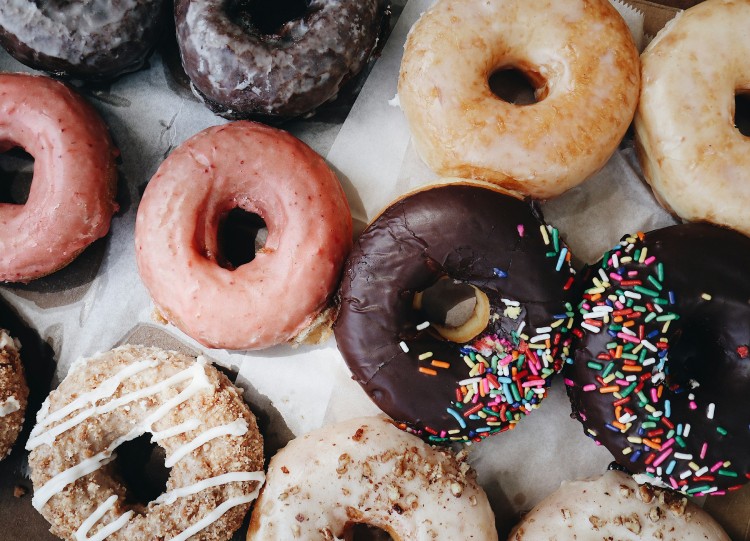
A well-made yeast donut has a thin golden shell and a soft, springy center filled with small air pockets. That texture does not come from adding extra yeast. It depends on soft dough, a complete final proof, and frying oil that stays close to 350°F.
The times in this recipe are useful estimates, but the dough gets the final say. Room temperature, yeast activity, and the size of the cut donuts all affect the pace, so every rise includes a visual cue. Reading the dough is more reliable than forcing it to match a rigid schedule.
Recipe at a glance
- Yield: 10–12 ring donuts, plus donut holes
- Active time: about 35 minutes
- Proofing: about 1 hour 45 minutes to 2 hours 15 minutes
- Frying: 12–15 minutes
- Oil temperature: 350°F / 175°C; working range 340–355°F / 170–180°C
Yeast-raised or baked?
This recipe uses yeast and deep-frying to create a stretchy, bread-like, airy crumb with a delicate fried shell.
Baked donuts are usually leavened with baking powder. They are faster and have a more cake-like crumb. If that is what you want, use The LINES recipe for baked donuts without deep-frying.
Yeast donut ingredients
For the dough
- 3 cups (360 g) all-purpose flour; hold back about 20 g (a little under 3 tbsp) for adjustment
- 2/3 cup plus 1 tbsp (170 ml) milk
- 1 large egg
- 3 tbsp plus 2 tsp (45 g) granulated sugar
- 2 1/4 tsp (7 g) instant yeast
- 1 tsp (6 g) fine salt
- 3 1/2 tbsp (50 g) unsalted butter, softened
- 1/2 tsp vanilla extract
- 1/4 tsp ground nutmeg, optional
For frying
- about 4–6 cups (1–1.5 L) refined canola, peanut, sunflower, or neutral vegetable oil; the exact amount depends on the pot
Choose a refined oil intended for high-heat cooking. An unrefined oil with a strong flavor is unnecessary here.
For the simple glaze
- 1 1/3 cups (160 g) confectioners' sugar
- 2–3 tbsp milk
- 1/2 tsp vanilla extract
- pinch of salt
Allergens: wheat, milk, and egg.
How to mix and knead the dough
- Warm the milk gently. It should be just warm, about 82–90°F / 28–32°C, rather than hot. Instant yeast can go directly into the flour. If using active dry yeast, stir it into the milk with 1 teaspoon of the sugar and wait 5–10 minutes, until a foamy layer appears.
- Bring the dough together. Mix the flour, reserving about 20 g, with the remaining sugar, yeast, salt, and nutmeg. Add the milk, egg, and vanilla. Stir until no dry patches remain, cover, and rest for 10 minutes. This short pause makes the dough easier to knead.
- Develop the gluten. Knead for 5–6 minutes by hand, or about 4 minutes with a dough hook on low speed. The dough will still feel tacky.
- Add the butter gradually. Work in the softened butter in three or four additions. Continue kneading for 7–10 minutes, until the dough is smooth, elastic, and only slightly sticky. Use some of the reserved flour only if the fully kneaded dough still cannot hold its shape.
Check the dough: gently stretch a small piece between your fingers. If it forms a thin, translucent membrane before tearing, the gluten is developed. If it tears immediately with a rough edge, knead for another 2–3 minutes.
First rise: watch the volume, not just the clock
Shape the dough into a ball, set it in a lightly greased bowl, and cover. At a room temperature of about 73–77°F / 23–25°C, the first rise usually takes 60–90 minutes. The dough should expand to roughly 1 1/2 to 1 3/4 times its original size and feel aerated. Do not set it on a hot radiator or in an overly warm oven; melting butter weakens the dough's structure.
How to shape even ring donuts
- Turn the dough onto a barely floured work surface. Press it gently without forcing out every bubble.
- Roll to 3/8–1/2 inch (1–1.2 cm) thick. Cut 3-inch (7–8 cm) rounds with 1–1 1/4-inch (2.5–3 cm) center holes.
- Place the rings on small parchment squares or a lightly greased sheet pan. This makes them easier to lift without stretching.
- Gather scraps once, rest them for 10 minutes, and roll again. Repeated rerolling makes the final donuts tighter.
Final proof: the step that controls the crumb
Cover the shaped donuts and proof for about 30–45 minutes. A ready donut looks noticeably larger, feels light, and jiggles slightly when the pan moves. A very gentle fingertip indentation should return slowly rather than springing back at once.
- The indentation disappears immediately: proof for another 10–15 minutes.
- The donut collapses when touched: it is overproofed; fry it right away and handle it with extra care.
Set up the fryer safely
Hot oil needs your full attention. Use a stable, deep, heavy pot and never fill it more than one-third full with oil. Keep the dough and tools dry. Have a fitted metal lid nearby, and move towels, paper, and other flammable items away from the stove.
Never leave heating oil unattended. If it begins to smoke, turn off the heat and let it cool. If the oil catches fire, do not move the pot and never add water. If it is safe to do so, turn off the heat, cover the pot with the metal lid, leave the area, and call emergency services.
How to fry yeast donuts at 350°F
- Build a landing station first. Set a wire rack over a sheet pan and place a metal spider, slotted spoon, or tongs nearby. Once the oil is hot, you should not be searching the kitchen for tools.
- Heat the oil to 350°F / 175°C. A deep-fry or candy thermometer is the most reliable guide. Keep the oil between 340°F and 355°F / 170–180°C while frying.
- Work in small batches. Lower one or two donuts into the oil without dropping them. Fry for about 45–60 seconds on the first side and 40–50 seconds on the second. Wait for the oil to return to the working range before adding the next batch.
- Cut open the first donut. Rest it for a minute, then check the center. It should be springy with no wet line of raw dough. If the shell is dark before the center cooks, reduce the heat and let the oil return to 340–350°F.
- Drain on the rack. Donut holes cook faster, so start checking them after 25–30 seconds.
Simple vanilla glaze
Whisk the confectioners' sugar with 2 tablespoons milk, the vanilla, and salt. Add more milk 1 teaspoon at a time until the glaze is thick but flowing. Dip the donuts 8–10 minutes after frying, when they are warm rather than piping hot. Return them to the rack until the coating sets.
For an even simpler finish, toss the warm donuts in superfine sugar or cinnamon sugar.
Yeast donut troubleshooting
How to use this guide: select a row or its arrow to expand the recommendation.
The donuts are dense with very few air pockets
The dough was probably too stiff from excess flour, or the shaped donuts did not finish their final proof. Keep the dough soft and use the reserved flour only after kneading. Before frying, the rings should look visibly puffy and a fingertip indentation should return slowly.
The donuts absorbed too much oil
The temperature may have fallen below 340°F / 170°C because the batch was too large or the burner was too low. Fry only one or two at a time and let the oil recover before the next batch. Severely overproofed donuts can also collapse and absorb more oil.
The outside is dark but the center is raw
The oil was hotter than 355°F / 180°C or the dough was rolled too thick. Check the thermometer, keep the rings around 3/8–1/2 inch thick, and cut open the first donut before committing the entire batch.
The donuts wrinkle after frying
A little shrinkage is normal. Severe wrinkling usually points to overproofing or an undercooked center. Shorten the final proof, transfer the rings without pressing them, and inspect the first fried donut inside.
The dough is too sticky to cut cleanly
Do not immediately bury it in flour. Chill the kneaded dough for 20–30 minutes, or lightly oil your hands and work surface. Excess flour makes a drier, tighter crumb.
Can the dough rise overnight?
Yes. After kneading, cover the dough and refrigerate it for 8–12 hours. The next day, let it sit for 15–20 minutes, shape the donuts, and complete the final proof. Cold dough may need 45–75 minutes, so use the visual and fingertip tests rather than the clock alone.
Fried donuts are at their best the day they are made. Cool them completely before storing in an airtight container at room temperature, and wait to glaze them if you want the surface to stay dry.
Sources and editorial note
The previous The LINES version was adapted from King Arthur Baking. This rewrite uses a different ingredient balance, adds the butter separately, shapes a thicker ring, defines visual proofing tests, gives a working oil-temperature range, and includes original troubleshooting.