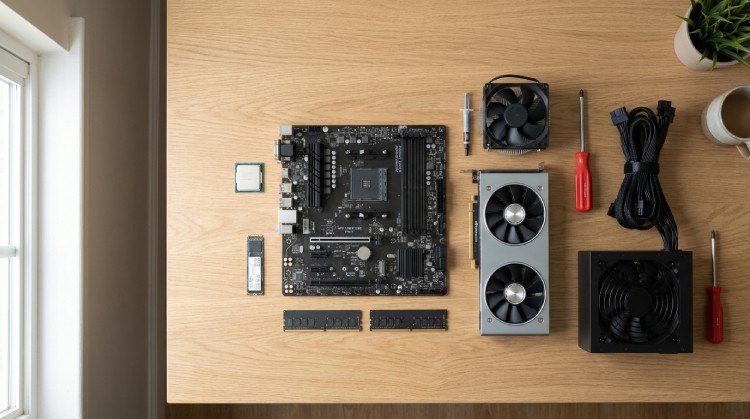
Building your own computer is like assembling an expensive LEGO set. If you understand the logic behind each part and follow a clear sequence, the process will bring not only cost savings but also immense satisfaction from the result.
In this article, we will break down the anatomy of a modern computer and go step-by-step from an empty case to the first system boot. We will pay special attention to the power cables, as this is where the highest risk of making a fatal mistake lies.
🛠 Preparation: What You Need and How to Organize Your Space
A successful build starts with organizing your workspace.
- Tools: You will only need one Phillips-head screwdriver (Phillips #2). It is highly recommended that it has a magnetic tip—this will save your nerves when a tiny screw inevitably drops inside the case.
- Workspace: Build your PC on a large, clean wooden or plastic table.
- Static electricity is your enemy: Your body can accumulate a static charge capable of "killing" a microchip. Before starting, be sure to touch a large grounded metal object (like a radiator or a metal table leg) to discharge yourself.
- Motherboard manual: Keep it close at hand.
Step 1. Installing the Processor (CPU)
The most crucial step is best done outside the case. Place the motherboard on top of its anti-static bag and the cardboard box it came in.
The installation mechanism depends on the manufacturer (Intel or AMD), but the general rule is the same: the processor should drop into the socket perfectly easily, without any pressure.
- Push the metal retention lever on the motherboard socket down and out to the side, then lift it up.
- Look for a small indicator mark on the corner of the processor (usually a golden triangle). Find the matching triangle on the plastic or metal of the socket.
- Align them. Holding the processor carefully by the edges (without touching the pins underneath!), gently lower it into the socket.
- Once it sits flush in its grooves, lower the metal frame and lock the lever back into place. You will feel some resistance—this is normal; the frame is pressing the contacts together.

Step 2. Random Access Memory (RAM)
The next step is the RAM. If you bought a kit of two sticks (which you should for fast dual-channel mode), they must be inserted into the correct slots. In 99% of cases, these are the second and fourth slots counting away from the processor (often labeled A2 and B2). This is necessary for maximum performance.
Push down the plastic retention clips at the edges of the slot. Notice the notch (key) on the bottom edge of the RAM stick—it is off-center, making it impossible to install the stick backward. Align the notch with the ridge in the slot and push down evenly on both top edges of the stick. You should hear a distinct "click" from both sides.

Step 3. M.2 SSD Storage
Modern drives look like a stick of chewing gum and are installed directly onto the motherboard without any messy cables.
Locate the M.2 slot (it is often hidden under a metal heatsink that you will need to unscrew). Insert the drive into the slot at roughly a 30-degree angle until the gold contacts disappear. Then gently press the other end down towards the board and secure it with the tiny included screw. If the heatsink has a thermal pad, don't forget to peel off the protective plastic film before screwing the heatsink back on!

What if you have a classic Hard Drive (HDD) or a standard 2.5-inch SATA SSD?
Unlike the M.2 format, which plugs straight into the board, classic drives require a bit more effort and cables. First, they need to be physically secured in the case: large hard drives (HDDs) usually slide into metal drive cages at the bottom, while light 2.5" SSDs are screwed to the side panel of the case.
After mounting, you must connect two cables to each drive (both have L-shaped connectors, so you can't plug them in wrong):
- Power Cable (SATA Power): This is the wider, flat connector coming from your power supply.
-
Data Cable (SATA Data): This is the narrower cable (usually included in your motherboard box). One end goes into the drive, and the other plugs into the corresponding SATA port on the right edge of the motherboard.


Step 4. CPU Cooling (Cooler)
A processor heats up in seconds, so it absolutely needs heat dissipation.
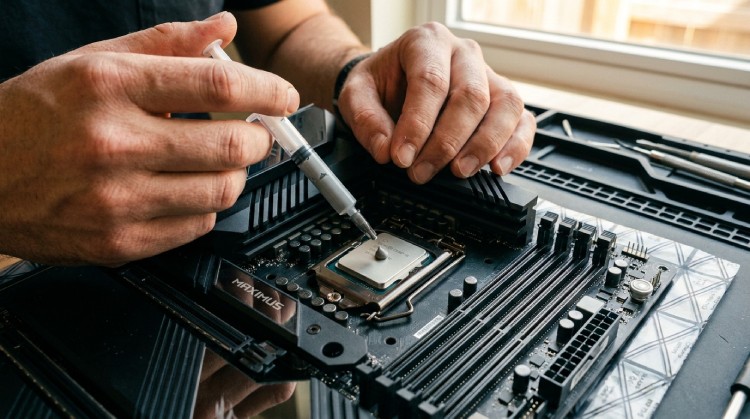
If you bought an aftermarket cooler, check its base. If there is no pre-applied gray paste, you will need to apply it yourself. Squeeze out a pea-sized drop of thermal paste directly into the center of the CPU. You don't need more—the pressure of the cooler will evenly spread it across the surface.
Place the heatsink on the processor and tighten the mounting screws in a cross pattern. Start by giving the top-left and bottom-right screws a few turns, then do the same for the others. This ensures even mounting pressure without tilting.
Important: Plug the cooler's fan cable into the dedicated header on the motherboard (usually located at the top and labeled CPU_FAN).

Step 5. Mounting the Motherboard in the Case
Now our motherboard resembles the assembled heart of the system. It's time to transfer it into the case.
- I/O Shield: If the metal port shield isn't pre-installed on your motherboard, snap it into the rectangular cutout at the rear of the case from the inside (until it clicks firmly around all edges).
- Standoffs: Ensure that the special metal pegs (standoffs) are screwed into the case corresponding to the mounting holes on your motherboard. Critically important: the back of the motherboard must never touch the bare metal of the case, or it will short circuit!
Carefully lower the board into the case, sliding the ports into the I/O shield. Secure the board with screws. Do not overtighten them to avoid cracking the PCB.
Step 6. Power Supply & Cable Management
Install the power supply (PSU) into its compartment (most often at the bottom of the case). If there is a ventilation grille and a dust filter underneath, the PSU fan should face downwards (so it draws cool air from outside the case).
Now let's deal with the power delivery. All connectors are keyed differently (idiot-proofed), but you still need to pay attention:
- Motherboard Power (24-pin ATX): This is the thickest cable. It plugs into the long slot on the right edge of the board. You need to apply firm pressure until the plastic latch clicks.
- CPU Power (EPS 8-pin or 4+4): This cable routes to the top-left corner of the board (labeled
CPU_PWR).

Step 7. Front Panel
This is the most tedious stage. We need to connect the buttons and LED indicators of the case itself to the motherboard so the PC can turn on. Find the cluster of tiny pins in the bottom right corner of the board labeled JFP1, F_PANEL, or PANEL.
Open your motherboard manual to the schematic of this header and carefully plug in the tiny wires:
POWER SW— responsible for the power button (+/- polarity does not matter here).RESET SW— the restart button.POWER LEDandHDD LED— operation indicators. (Polarity matters here: if you mix up positive and negative, the case lights simply won't turn on, but nothing will short out).

Step 8. Installing the Graphics Card (GPU)
The graphics card is always installed in the highest and longest slot on the motherboard (called PCIe x16), closest to the CPU. This slot provides the maximum data transfer bandwidth.
Remove the necessary metal PCIe expansion slot covers on the back of the case, push down the plastic retention latch on the motherboard slot, and firmly press the graphics card in until you hear a distinct click. Be sure to secure it to the case with screws—modern GPUs are very heavy and can rip out the slot under their own weight.
Finally, connect the PCIe power cables (the 6+2 pin ones) from the power supply to the graphics card. Note that some budget GPUs do not require additional power cables; verify this on the manufacturer's website or where you purchased it.

🎮 Interactive Mini-Quiz: Connect the Cables Correctly!
Test your knowledge before building for real. Choose the correct connector for each component. Be careful: a mistake could "fry" your system!
First Boot and Checklist
The build is complete! But before you hit the power button, let's run through a quick checklist:
- Is the CPU cooler fan plugged into the
CPU_FANheader? - Is the thick 24-pin cable pushed all the way in?
- Is the top-left corner of the board populated with the specific CPU power cable (4+4), and NOT the GPU cable?
- Crucial: Is your monitor cable plugged horizontally directly into the graphics card, and not vertically into the motherboard? Otherwise, the display output will run off integrated graphics instead of your dedicated GPU.
- Is the switch on the back of the power supply flipped to the "I" (On) position?
If everything checks out—press the Power button on the case. You should hear a quiet hum, the fans will start spinning, and in a few seconds, your motherboard manufacturer's logo will appear on the screen. This means the system has successfully passed its Power-On Self-Test (POST). All that's left is to enter the BIOS, verify that the system detects all your components (CPU, RAM, drives), and proceed to install the Windows operating system.
Congratulations! You have just successfully built your first computer. As it turns out, it's not as difficult as it might seem at first glance.