You've already used our complete PC dust cleaning guide, but your CPU temperature still resembles a hot frying pan? Then it's time to move on to the next step — replacing the thermal interface.
Thermal paste is a special heat-conducting compound that fills microscopic scratches between the CPU and the cooler's heatsink. Over time (usually 2-3 years), it dries out, turns into a "stone," and loses its ability to dissipate heat. In this guide, we will detail how to safely remove the cooling system, which paste is best to choose, and how to apply it correctly.
Replacing thermal paste is a critical process. Special care should be taken when servicing graphics cards (disassembling them voids the manufacturer's warranty!). The user performs all actions at their own risk. The editorial team is not responsible for any potential damage to components. If you've never held a screwdriver before, it's better to leave this to a service center.
🛠️ What will you need to replace the thermal paste?
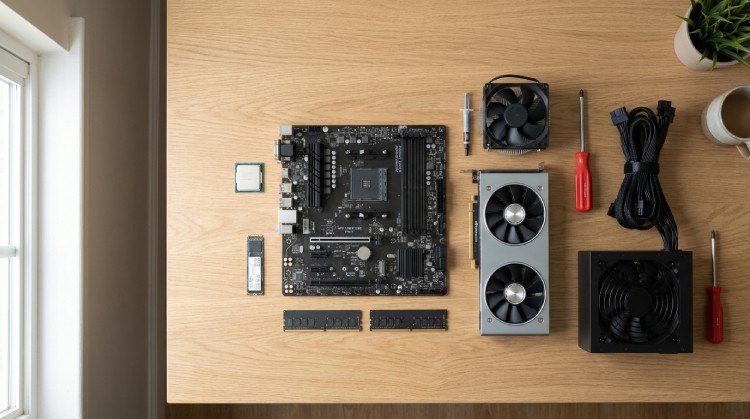
Don't rush to unscrew the cooler until you prepare your workspace. You will need:
- Thermal paste (in a syringe).
- Isopropyl alcohol. (Minimum 70%, ideally 90% and above). It quickly dissolves the old paste and evaporates instantly without shorting contacts.
- Cotton swabs and cotton pads (or lint-free paper towels).
- A screwdriver (usually Phillips) to remove the cooling system.
- A plastic spudger or an old credit card (optional, if you prefer spreading the paste).

🤔 Which thermal paste to choose?
The choice of thermal paste on the market is huge, but for 90% of users, time-tested standards will do. Avoid the cheapest pastes in huge tubes (they dry quickly) and "liquid metal" (it conducts electricity and can short the board if you are not a professional).
Suitable for a home PC:
- Arctic MX-4 or MX-6: Best price/quality ratio. Easy to apply and doesn't dry out for a long time.
- Thermal Grizzly Kryonaut: A premium choice for gamers and hot CPUs.
- Noctua NT-H1 or NT-H2: Very reliable pastes from the famous Austrian brand.
🔥 Step 1: Warming up the PC and safely removing the cooler
If the thermal paste was replaced a very long time ago, trying to remove the cooler from a cold processor is not the best idea, as the thermal paste could have dried hard. If you yank the cooler towards you (especially on previous generation AMD Ryzen processors), you can rip the processor out of the socket along with the closed latch, bending all the pins!
- Turn on the PC and run a "heavy" game or stress test for 10-15 minutes. This will warm up and soften the old thermal paste.
- Turn off the computer and completely unplug the power cable.
- Unscrew the screws or release the latches holding the cooler.
- The "twisting" rule: Do not pull the heatsink straight up! Slightly twist it left and right around its axis by a few millimeters. When you feel the grip loosen, carefully remove it.
🧼 Step 2: Cleaning off the old paste
A layer of old gray mass will remain on the processor and the cooler's base. You DO NOT need to remove the processor from the motherboard — clean it right there.
Moisten a cotton pad with isopropyl alcohol and carefully wipe the old paste off both surfaces. If the paste has turned to stone, place an alcohol-soaked cotton pad on it for a minute to soften it. Repeat the procedure until both surfaces (the CPU heat spreader and the cooler base) are perfectly clean and mirror-like.
💧 Step 3: Proper application of new thermal paste
How much paste is needed? More doesn't mean better. A thick layer of paste will act as an insulator rather than a conductor. The layer should be as thin as possible.
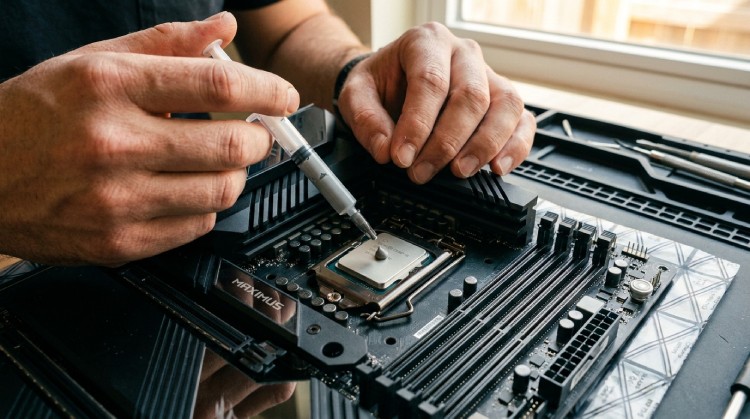
1. "Pea" Method: Squeeze a drop of paste the size of a pea or a grain of rice right in the center of the processor. When you press the cooler on top, the pressure itself will evenly distribute the paste in a perfect circular layer.
2. "X" Method: For very large processors, draw a thin cross from corner to corner.

Carefully place the cooler back on. Tighten the screws in a cross pattern (diagonally) a few turns at a time so that the pressure is distributed evenly. Do not overtighten — stop as soon as you feel resistance.
🎮 What about the graphics card (GPU)?
Replacing the thermal paste on a graphics card is a more complex process. It should only be done when the graphics card is seriously overheating, making noise, and the warranty period has already expired.
Main differences:
- Unlike a CPU, a graphics card die (GPU) does not have a protective metal cover. It is very fragile. If you press too hard on it or tilt the heatsink during installation, the chip can crack.
- The "pea" method doesn't work for a graphics card. The die has a rectangular shape, and it must be covered entirely with paste without exception. Therefore, apply the paste and spread it evenly in a thin layer over the entire surface of the die using a plastic spudger.
- In addition to thermal paste, graphics cards use thermal pads for memory and power delivery components. If you disassemble the card, the old pads might tear, so it's better to have a set of new thermal pads of the correct thickness prepared in advance.
✅ Final check
Plug the CPU cooler into the CPU_FAN header on the motherboard (this is very often forgotten!). Turn on the PC. If you did everything right, your computer will run much quieter, and checking the temperatures in special programs (like HWMonitor) will show a drop of 10-20 degrees under load!