Blackcurrants rarely demand complicated gardening. Give them moisture-retentive soil, a reasonable amount of sunlight and a little renewal pruning each year, and they can crop generously. Leave every stem untouched, however, and the centre soon becomes crowded, new growth slows and the berries gradually become smaller.
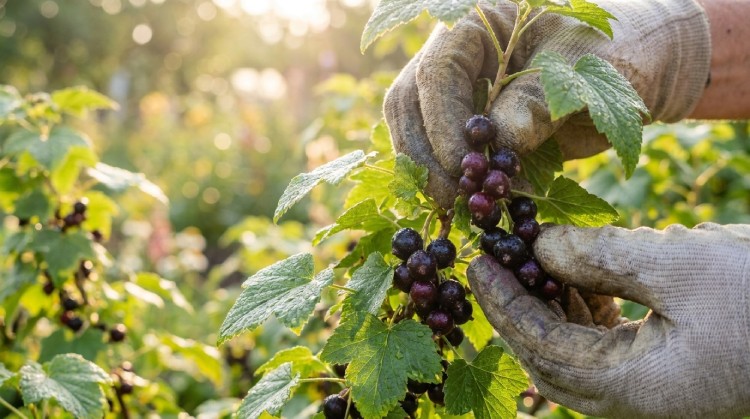
You can often recognise a blackcurrant before tasting one. The fruit, leaves and young shoots all carry that distinctive aroma. The berries can be eaten fresh, frozen, baked, made into jam or used in savoury sauces. First, though, the bush needs a place where it can remain productive for years.
Sun helps, but a hot, dry corner does not
Blackcurrants usually crop best in full sun, although they tolerate light shade better than many other soft fruits. In a hot, dry climate, a little afternoon shade can even be useful. More importantly, the soil should hold moisture without remaining waterlogged after rain.
A low part of the garden is not automatically unsuitable, but cold air during flowering can damage the blossom and saturated soil can damage the roots. A good position is sheltered from strong wind, with fertile, moisture-retentive yet well-drained soil.
Why blackcurrants are planted a little deeper
Bare-root plants are easiest to establish during the dormant season, from late autumn to early spring, when the ground is neither frozen nor waterlogged. A container-grown bush can be planted at other times, but it will need particularly careful watering in warm weather.
A conventional bush is planted about 5cm deeper than it grew at the nursery. The buried stem encourages fresh shoots from the base and helps create a strong, multi-stemmed plant. Gardeners sometimes lean the plant for the same reason, but an exact 45-degree angle is not essential.
Make the hole wide enough for the roots to spread without bending. On poor soil, mature compost can be blended with the excavated earth. Water thoroughly after planting and add mulch, leaving a small clear area around the stems.
The first pruning can look like a mistake
When a conventional bush is planted leafless during dormancy, its stems are often cut back to one or two buds above the ground. It looks drastic, but redirects the plant’s energy into strong new shoots from the base. There may be little or no crop in the first summer, and that is perfectly normal.
Do not apply this rule automatically to a standard-trained blackcurrant or to a leafy container plant bought in the middle of the growing season. In those cases, follow the nursery’s instructions and allow the plant to establish first.
The most important watering weeks arrive as berries swell
Blackcurrant roots are relatively shallow, so the upper soil should not remain dry for long. Check a young plant regularly, and pay particular attention to an established bush while its fruit is forming and swelling. Water less often but thoroughly enough to moisten the root zone rather than merely dampening the surface.
A layer of compost or another organic mulch keeps the soil cooler and suppresses weeds. Grass clippings can be used in thin, partly dried layers so they do not collapse into a wet, airless mat. Keep all mulch away from the base of the stems.
Do not diagnose a deficiency from one leaf
Brown leaf edges can appear when potassium is deficient, but drought, root damage, excess salts and some diseases can look similar. Adding potassium sulphate or wood ash immediately may therefore solve nothing.
First check the soil moisture, the condition of the whole plant and its feeding history. In ordinary garden soil, a spring application of a balanced fertiliser at the label rate and a layer of mature compost may be sufficient. Wood ash raises pH and contains soluble salts, so use it sparingly and only where soil conditions justify it.
The secret is not the number of stems but their age
Blackcurrants carry their best crops on strong young wood produced during the previous few years. Older stems become thicker and darker, make less new growth and gradually produce fewer good berries.
- For a bush under three years old, prune lightly if growth is strong, removing only weak and low-lying shoots during dormancy.
- For an established bush, prune every winter and remove up to one-third of the oldest, least productive stems at ground level.
- At the same time, remove dead, diseased, broken, crossing stems and those lying on the ground.
- Do not renovate the entire plant in one day if it is still alive and cropping. Gradual renewal preserves some fruit while replacement shoots develop.
There is no need to count exactly 12 or 15 stems. A more useful guide is an open bush containing wood of different ages and producing several strong new shoots each year.
When the crop disappears before you arrive
Birds are often the first visitors to find ripening blackcurrants. If they regularly strip your bushes, install netting over a frame before the berries colour. Secure and tension it carefully so wildlife cannot become trapped.
Unnaturally enlarged buds may indicate blackcurrant big bud mite, distorted leaves can be caused by aphids or gall midge, and a white coating may be mildew. These symptoms do not all have the same solution. A severely affected or virus-infected bush may be better removed; for a replacement, choose healthy certified stock and a cultivar with useful resistance.
Whole clusters or individual berries?
On many modern cultivars, most berries in a cluster ripen together. The whole cluster can then be cut and the berries removed in the kitchen. Older cultivars may ripen unevenly, with the upper berries turning black before the lower ones. Pick these selectively rather than waiting until the first fruit becomes overripe.
Harvest in dry weather after the dew has evaporated, and avoid crushing the berries in deep containers. To freeze them, sort the fruit, rinse quickly if necessary and dry it completely. Freeze the berries in a single layer first, then transfer them to an airtight bag or container.
Blackcurrants reward small, regular jobs: watering during drought, maintaining mulch and removing a few old stems each winter. This takes little time and continually creates room for the young growth that carries the best crop.