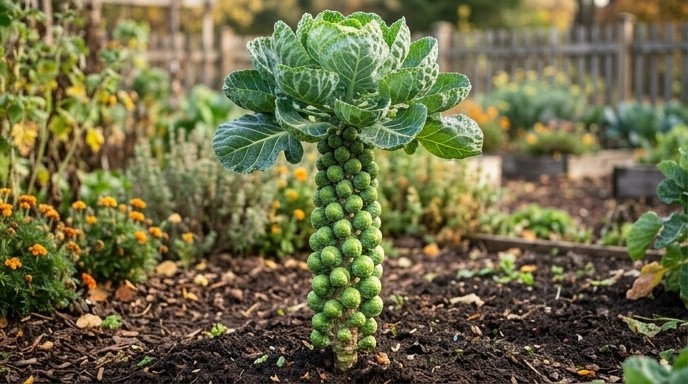
Brussels sprouts look as though dozens of miniature cabbages have been threaded onto a tall stalk. They occupy the garden for most of the season, but provide a fresh harvest after many other vegetables have gone. The main challenge is not complicated care but time: the plants must form their sprouts before persistent winter freezes arrive.
One plant, almost an entire gardening season
Brussels sprouts belong to the same species as cabbage, broccoli and kohlrabi, but produce their crop differently. Small, compact buds develop in the leaf axils along the stalk. The lowest sprouts begin swelling first, followed by those higher up.
The exact growing period depends on the cultivar. Some modern hybrids mature roughly 90–120 days after transplanting, while others need considerably longer. A blanket figure of 150–180 days therefore does not apply to every Brussels sprout variety.
This is an approximate calendar for climates similar to Ukraine’s. Actual timing depends on the region, cultivar and spring weather.
Choose the cultivar before choosing the sowing date
Early- or mid-season cultivars are safer in cooler regions with a shorter growing season. Late varieties suit areas with a long autumn and a low risk of hard frost arriving before the crop develops.
In Ukraine and similar climates, seeds are often started indoors in March or April. Avoid keeping seedlings excessively warm: bright light and cooler conditions help prevent weak, stretched growth. Harden plants off gradually before transplanting.
Move plants to their final position in late spring or early summer, once they have a healthy root system and are approximately 10–15 cm tall. Direct sowing is possible too, but uses more time in the bed and does not suit every climate.
Location, soil and spacing
Brussels sprouts need a sunny location, preferably sheltered from strong wind. The soil should be fertile and well-drained while still able to retain moisture. A pH of approximately 6.0–7.0 generally suits brassicas; very acidic soil increases the risk of clubroot.
This crop does stand better in reasonably firm, settled soil. “Firm,” however, does not mean waterlogged or compacted like concrete. Prepare an organically enriched bed in advance and allow it to settle. After transplanting, gently firm the soil around the roots by hand and water thoroughly.
Most tall cultivars need about 60 cm between plants and at least 60 cm between rows. Compact cultivars may require less room, so follow the seed packet. Crowding reduces air movement and makes it harder for good-quality sprouts to develop.
Summer care without excessive fertilizer
The bed can be enriched with compost or well-rotted organic matter before planting. Further feeding depends on soil fertility. Excess nitrogen does not automatically produce an earlier crop: it may encourage too much leafy growth and contribute to loose sprouts.
Keep watering consistent. Prolonged drought and abrupt moisture changes are particularly undesirable. A layer of organic mulch helps retain water and suppress weeds.
Tall plants in exposed sites may lean in the wind. They do not have to be earthed up according to a calendar, but a stake and soft tie can be added when needed. This is particularly useful for tall cultivars in light soil.
Protection that works throughout the season
Brussels sprouts attract many of the same pests as other brassicas, including cabbage white and moth caterpillars, aphids and slugs. Fine insect mesh can protect the bed for more than just the butterflies’ peak activity, provided its edges are secured and it does not press against the plants.
Inspect the undersides of leaves regularly and remove eggs and young caterpillars. If treatment is needed, use only products approved for edible crops and follow the label exactly. Remove diseased debris at the end of the season and avoid growing brassicas in the same place more often than once every three or four years.
Why the harvest moves from bottom to top
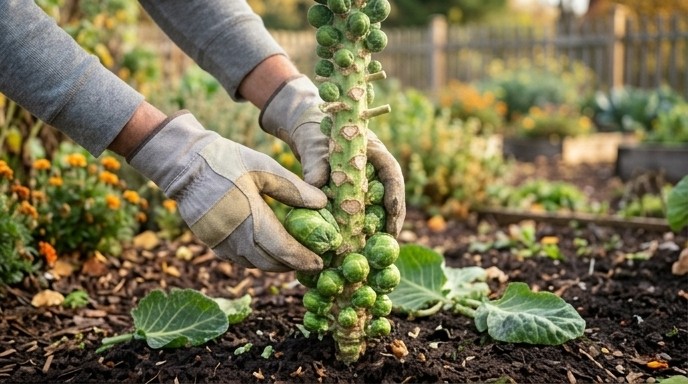
Sprouts at the base mature first. Harvest them when they are firm, tightly closed and about 2.5–4 cm across, depending on the cultivar. Snap them off with a sharp downward movement or cut them with a knife.
Remove lower yellowing leaves gradually, but do not strip the entire stalk prematurely: healthy foliage feeds the plant. Newer cultivars sometimes mature more uniformly and can be cut as a whole stalk, while traditional types are convenient to pick in several rounds.
Frost can improve flavour, but there is a limit
Cool autumn weather and light frost can make Brussels sprouts taste sweeter. Saying that “starch instantly turns into sugar” is an oversimplification, but the accumulation of soluble sugars during cold acclimation does influence flavour.
Cold tolerance is not unlimited and varies with cultivar, acclimation and the duration of freezing. Do not assume that every plant will withstand −10 °C or survive the whole winter under snow. If prolonged hard frost is forecast, harvest the sprouts or cut the stalks and move them to a cool, protected place.
Fresh sprouts keep only briefly in a domestic refrigerator, so use them soon or prepare them for freezing. Avoid storing them beside large quantities of apples or pears: ethylene accelerates ageing and may impair flavour.
The season in brief
Success begins when the seed is chosen: the cultivar must suit the length of your growing season. From there, Brussels sprouts need sun, space, consistent moisture and protection from wind and pests. Top the plants only when useful, then harvest from the bottom upwards without waiting for damaging frost.